")
")
Here is a mini tutorial explaining how to use the Agama installer for openSUSE Leap and Tumbleweed.
Tips and tricks for the openSUSE Agama installer.
The goal of this mini tutorial is to help you master the Agama installer for openSUSE Leap and Tumbleweed (and MicroOS).
The Agama installer has been in use since openSUSE Leap 16.
Level : intermediate.

Agama's functioning differs from the usual Linux installers, such as Ubuntu or Mint. It uses a service-based approach, which is non-linear and provides more installation options.
This is a different way of installing Linux, a bit unsettling in the beginning, but it allows users to configure their system the way they want, quickly and deeply. This non-linear installer is better suited for users who already know what they want their computer to become.
This tutorial has been written for openSUSE Leap 16.0 and 16.1 Alpha, but it should stay valid up to at least Leap 16.6 in 2030. (It will be updated if needed anyway).
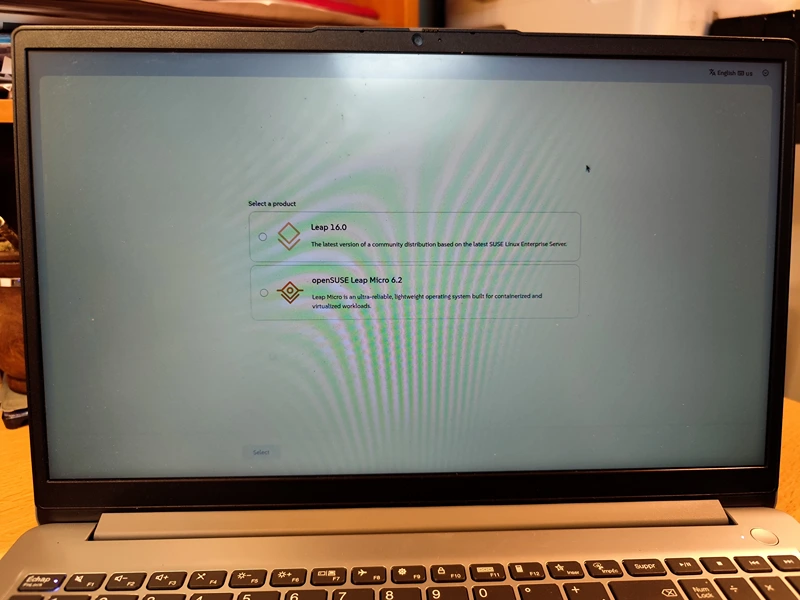
Leap or Leap Micro ?
Leap 16.0 (ou 16.1) is the "traditional" version of openSUSE Leap : very (extremely) stable, requires very few updates and works like your typical operating system.
Leap Micro is meant to be a container or virtual machine based OS, so it is more geared towards server usage. It's not really recommended for beginners but offers some real benefits (very simple to maintain and update).
General functioning of Agama.
Agama is not linear like the Ubuntu installer ! Instead, you get a menu, from which you choose and toggle the options you want. This requires a little bit more knowledge than with Ubuntu, but it's still a simple process.
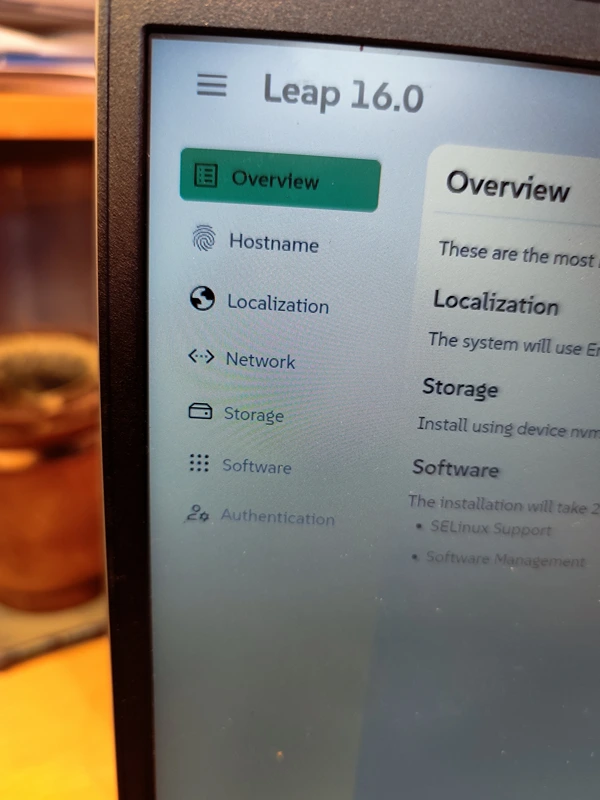
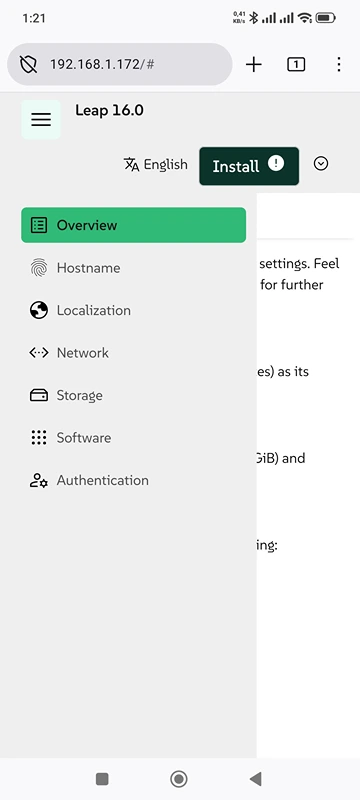
Agama option categories menu.
Available options.
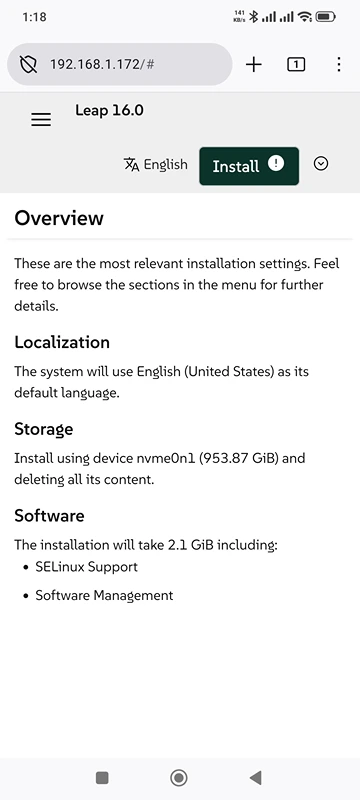
- Overview : general overview, summary of your system.
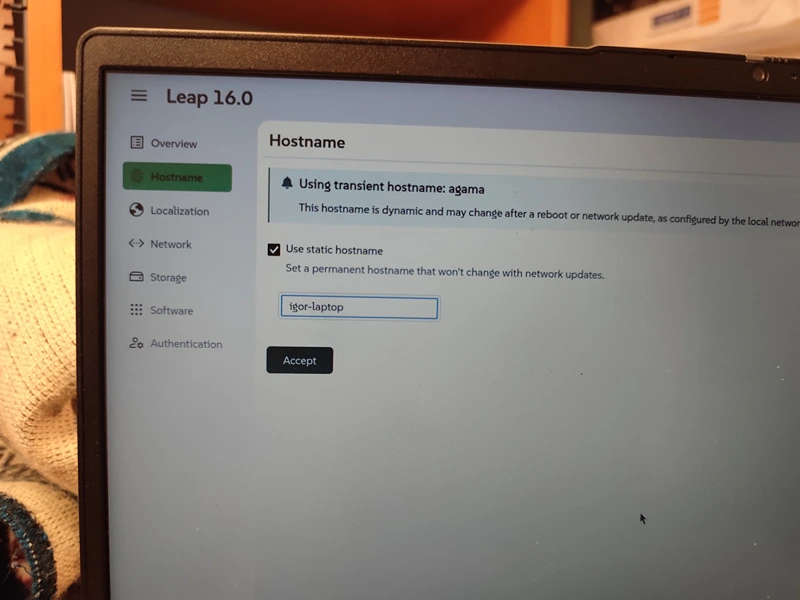
- Hostname : your computer's name on the local network ! Don't forget to set a static hostname if you wish so, it is not enabled by default like in Ubuntu ! Useful if you wish to remotely access your machine.
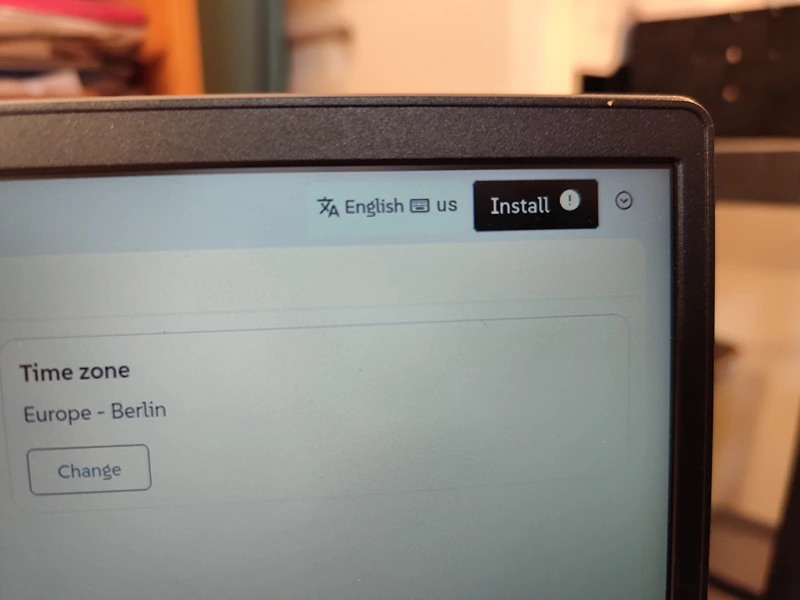
- Localization : System language, keyboard layout, time zone...
- Network : wired connections are setup automatically, but WiFi ones need to bet set up here.
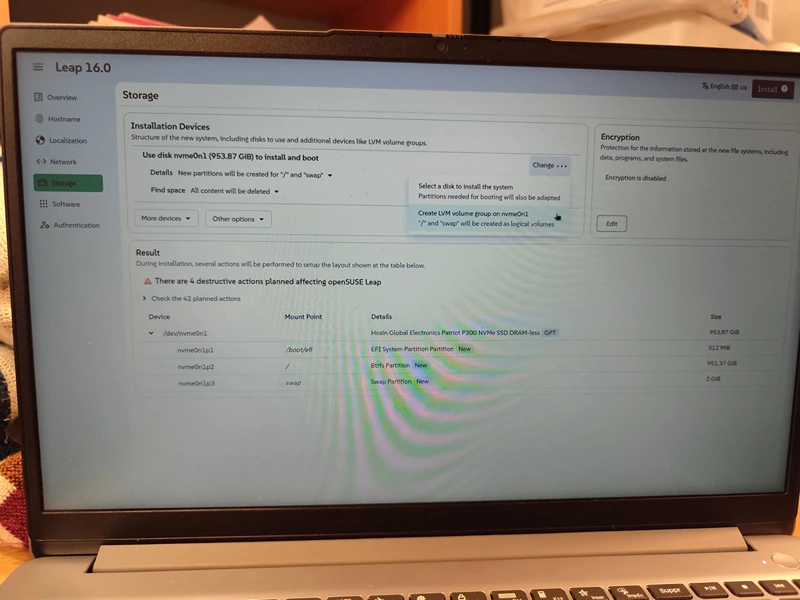
- Storage : very important, especially if you want to use LVM storage. The base settings will use up all your disks and is suitable for clean installs if you don't know what to choose.
- Software : also very important : it's here that you choose the pre-installed software, and the desktop environment you want. By default non is selected, so it means your system will only work in command line, don't forget this step if you want a GUI.
- Authentication : define your user and root accounts, SSH Keys if needed. You need at least one user to install openSUSE.
Once finished, click Install on the top left part of the screen.
Remotely access Agama from a phone or computer.
One of Agama's strengths is that you can access it through LAN. You can configure your system from your phone, or any other device connected to the local network. If you're on a public network, it's very risky to use this option as the connection is not really secure. But on a private one, it's great !
If you're using wired network, go on to the next step, if you wish to do it via WiFI, first choose Leap or Leap Micro, then go to the "Network" tab of the menu to set up a wireless connection.
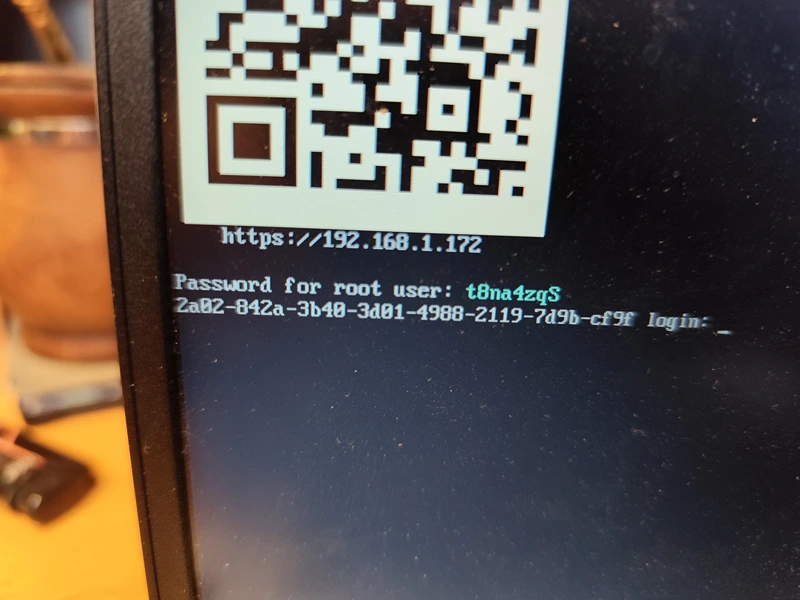
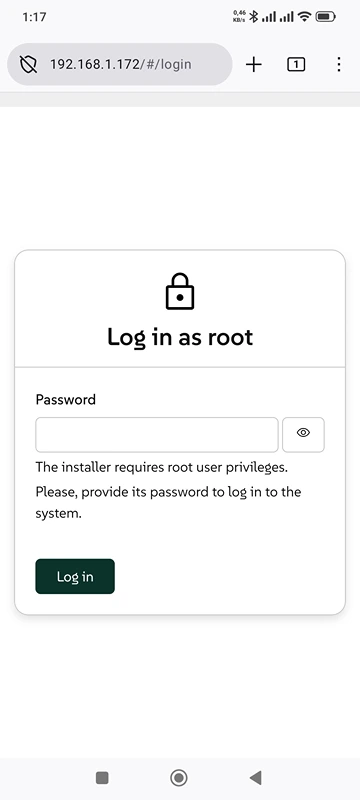
Once connected, press CTRL+ALT+F1, to see your IP address and the root password required to access the installer remotely.
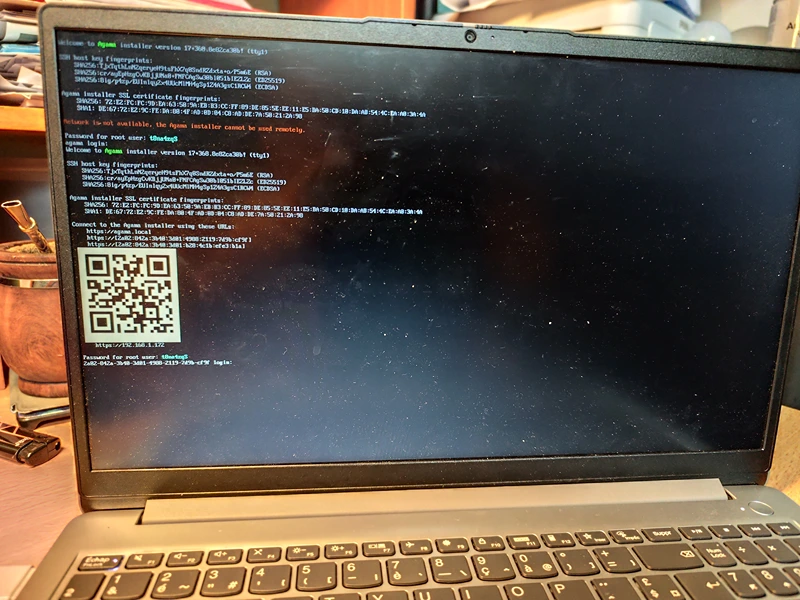
You can either scan the QR Code or, using a web browser on the other device, type the IP address of your Agama machine. E.g. : here it's 192.168.1.172.
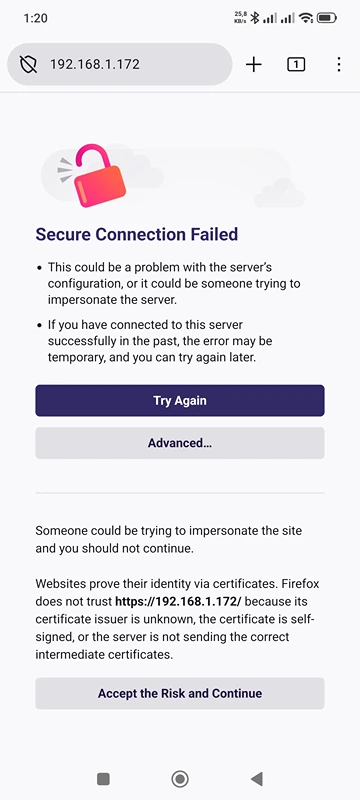
As said before, the connection is not secure (not https) so you will receive a warning, which you can safely ignore, on Firefox mobile for instance, tap "Learn more" then "Accept the risk and continue" (it's more or less the same on Google Chrome).
And voilà ! The installer works in the same way as on a computer.
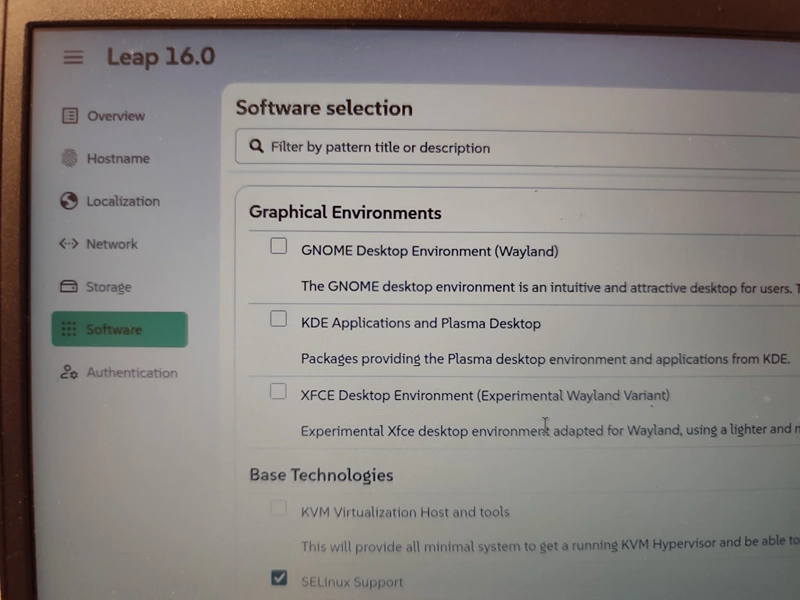
What desktop environment should I choose ?
openSUSE Leap comes bundled with no less than three DEs to choose from !
They're all good, Gnome being more about productivity and accessibility (à la MacOS), KDE geared towards advanced customization (traditional desktop paradigm, similar to Windows), and XFCE being the retro but very fast choice.
They all work well, except XFCE which is sadly still in experimental mode. So if you choose XFCE, the main features work well, but some software and settings are not there yet, we tried it. It's a bit sad but the XFCE dev team is working on it, as it is an interesting desktop environment for those looking for a fast and traditional desktop experience. (Great for low-power machines especially.) (As of May 2026).
When should I use LVM storage ?
LVM, logical volume management, is good if you have many physical drives that you want to "combine" in a single logical volume. It's also a good choice if you plan on adding or removing disks over time (as in servers for instance).
LVM volume management requires some experience, and you should only use healthy drives, as if one disk fails, the whole volume becomes unusable.
LVM also allows full disk encryption, so if you want a very secure system, why not use it.
That's it ! With these few tips and tricks it should be much easier to use the Agama installer. See you soon for more tutorials !