

Here is a tutorial about virtualization with openSUSE Leap 16 !
openSUSE Leap 16 (and Tumbleweed) natively supports a type 1 hypervisor : KVM. While other options exist, such as Virtualbox or Gnome Boxes, this one has the benefit of being natively supported and to offer better performance.
How to use KVM virtualization on openSUSE ?
KVM is an hypervizor (a software that allows to create and manage virtual machines) that has been part of the Linux kernel since 2007.
How to install KVM on openSUSE ?
openSUSE offers the option to install KVM and QEMU from the installation of the distro, to use virtualization software out-of-the-box. For instance, you could install openSUSE with only the bare minimum and KVM, to dedicate a physical machine to VMs hosting. (A little bit like Proxmox in fact.)
This solution has the benefit of being very reliable, KVM being more than 20 years old and still regularly updated and supported by Red Hat. It is a professional grade solution available for free with extensive documentation.
Let's see how to install KVM, and how to use it on openSUSE.
Table of contents
- Introduction
- Option 1 : install KVM during system setup.
- Option 2 : install KVM on an already setup system.
- Create and connect to a new virtual machine.
- Optionnal : install Cockpit to manage your system.
- Make your VMs visible on local network by using a bridge.
- Optionnal : install Cockpit-machines to manage your VMs.
- Connect to your VM on LAN using remote desktop software (RDP or SPICE).
- Conclusion.
- Ressources.
- Q&A
Prerequisistess :
- Level : advanced Linux user.
- A good mid-range CPU (with virtualization capabilities.).
- At least 8GB RAM. (it all depends on what you want to virtualize to be honest.).
- Some experience with openSUSE or any Linux distro from the Red Hat, Fedora, CentOS family. (it's a little bit different from Ubuntu and the Debian family).
Option 1 : install KVM during system setup.
The easiest way is to install KVM while you're installing your openSUSE system.
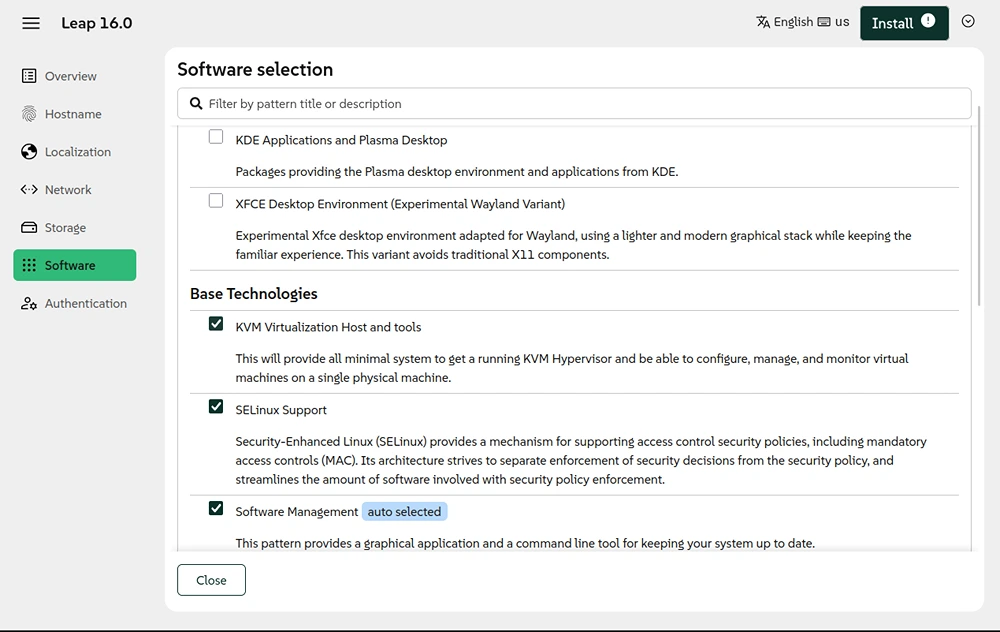
Virtualization options in the Agama installer.
During openSUSE installation, go to Software, and select “KVM Virtualization host and tools"
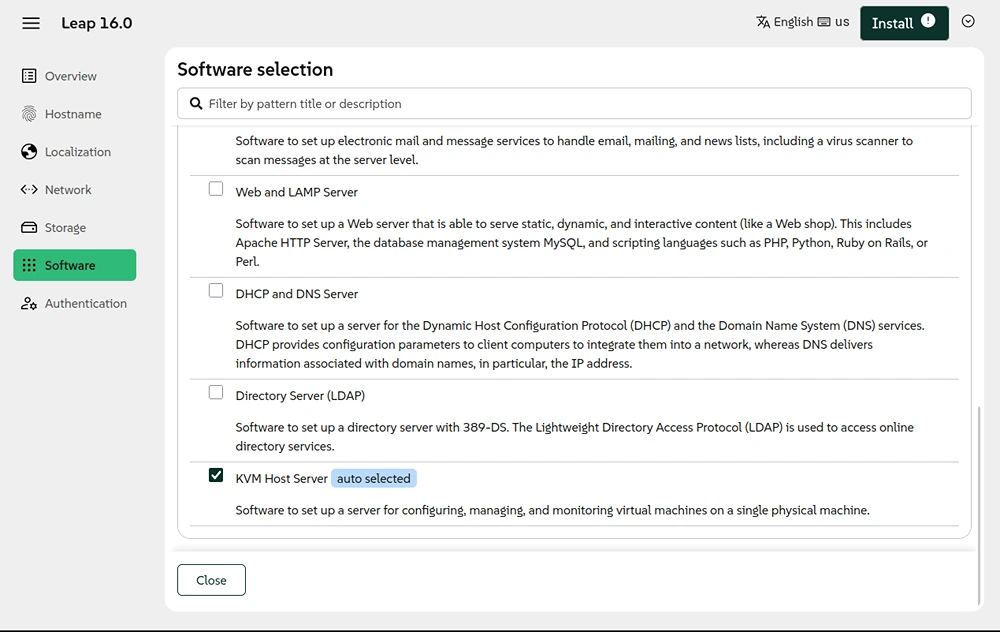
If it all goes well, the KVM host server should also be automatically selected further down the page, it is required to host the VMs.
The rest of the installation is done like an usual openSUSE install, if you wish, here is a small tutorial with tips&tricks on the Agama installer : Tips & tricks for the openSUSE Agama installer..
Option 2 : install KVM on an already setup system.

If your system is already set up, there's no need to do it from scratch, we're just going to install the "patterns" corresponding to KVM tools via Myrlyn.
What's Myrlyn ? (Except from an old magic man) It's the GUI (graphical user interface) for the openSUSE package installer, which provides users with "patterns" containing many packages for specific usages (e.g. : the "Multimedia" pattern including all the multimedia players for audio and video).
Of course it's Linux, so we could just use the Terminal and type some commands, but openSUSE offers the benefit of being a GUI friendly advanced distro, with deep settings being available graphically, so let's use the GUI for once !
Install Myrlyn :
Open a Terminal, then enter :
sudo zypper ref
sudo zypper in myrlyn
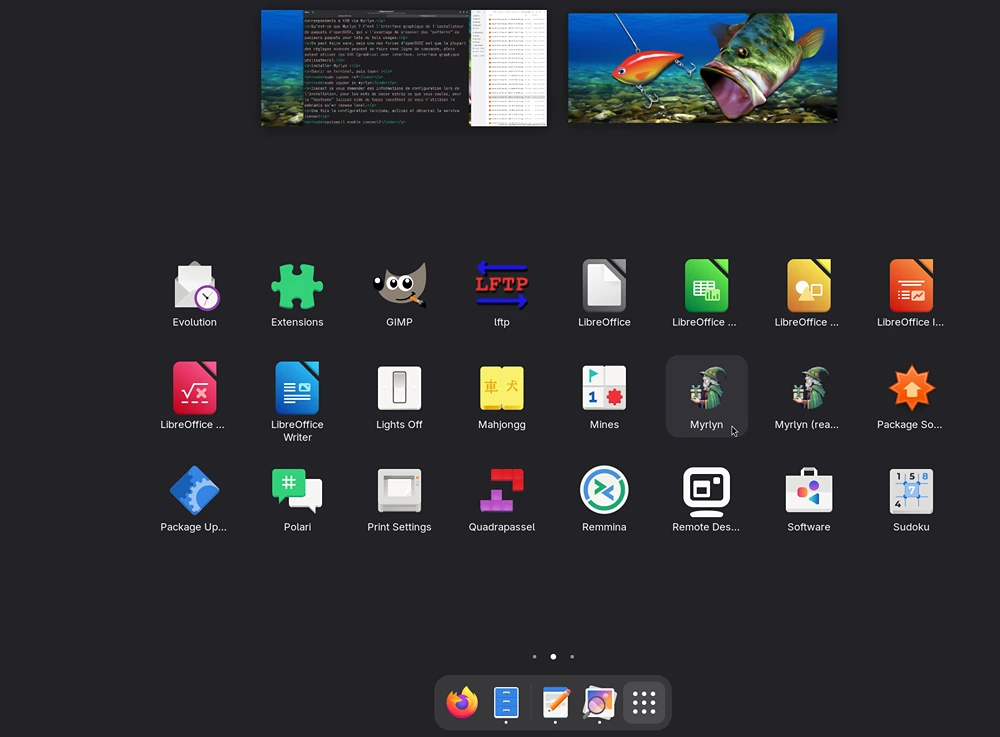
Myrlyn is a graphical package installer.
Click on Myrlyn (not the read-only version) and input your password.
In the "Patterns" tab, scroll down to "Base Technologies" and tick the "KVM virtualization host and tools" box.
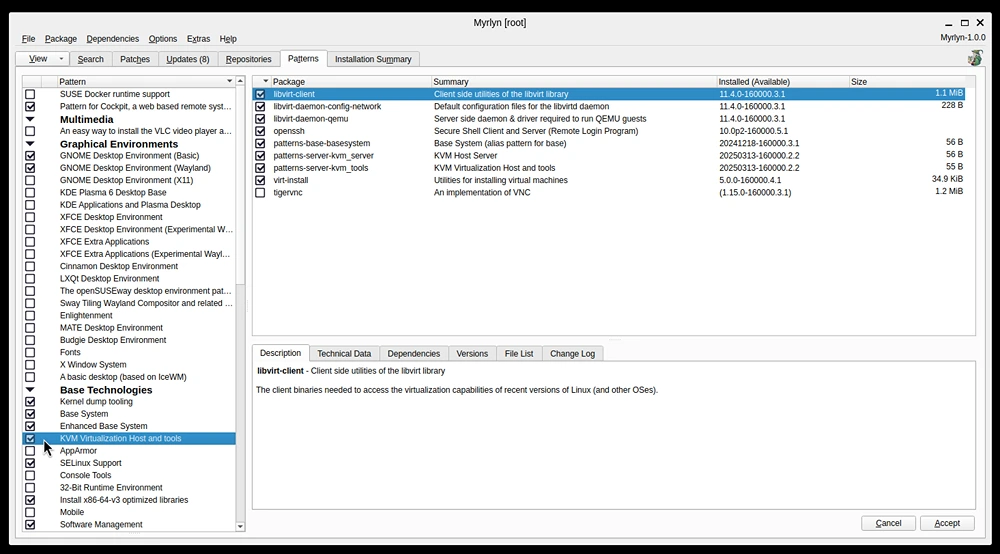
To manage your VMs with a GUI, you need to install the "virt-manager" package, which you can find in the "Search" tab.
Once you’ve selected all these packages, click on "Accept".
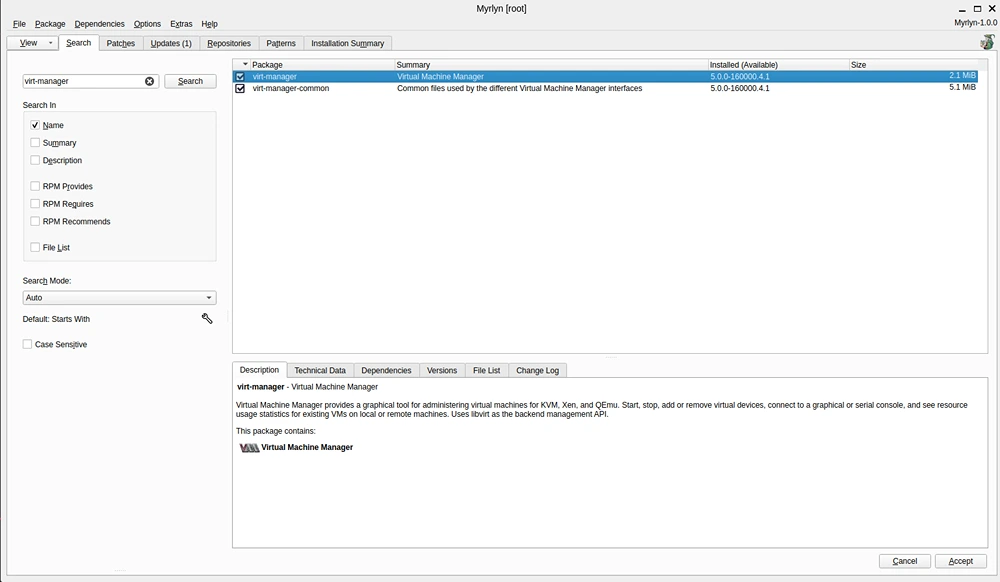
Myrlyn will probably warn you of changes, it's because KVM requires some dependencies and packages to function, if you agree just click on "Confirm".
Once installed, Myrlyn will automatically close, you can now find the virtual machines manager in your apps.
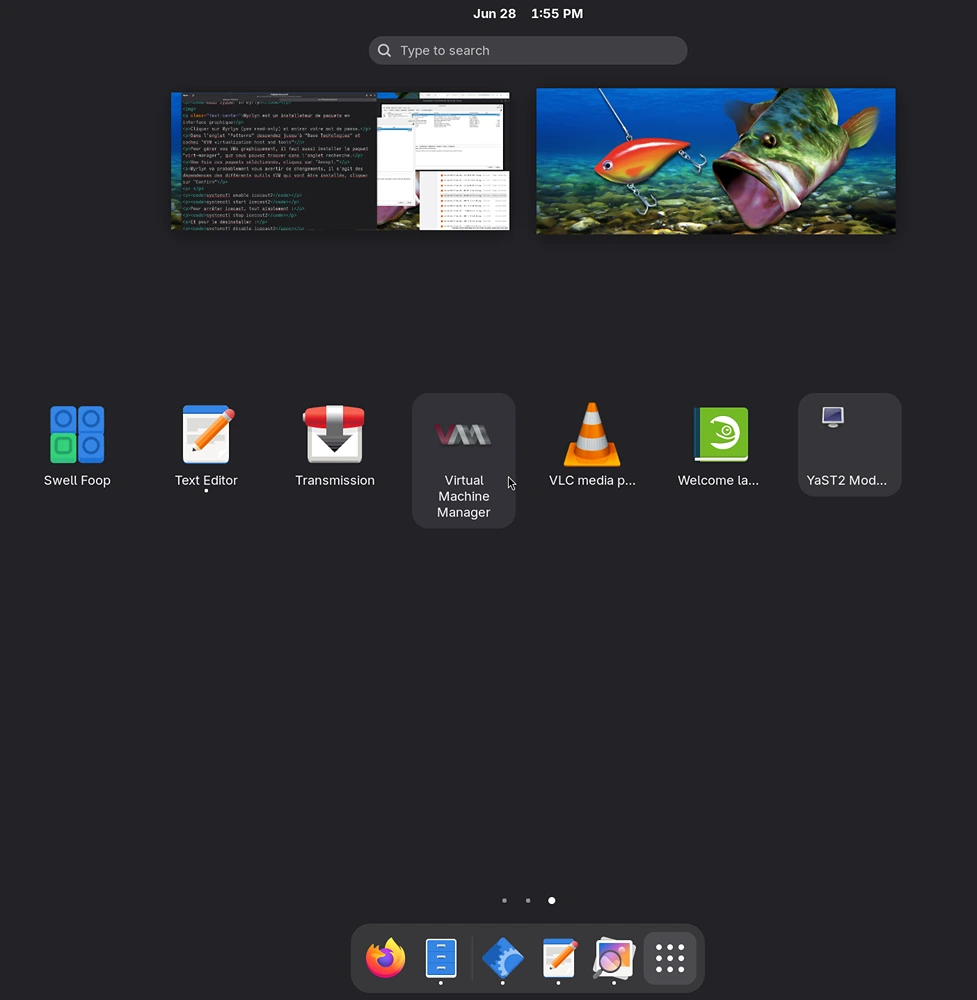
If you don't see it, try to reboot your system.
Create and connect to a new virtual machine.
Open the virtual machines manager.
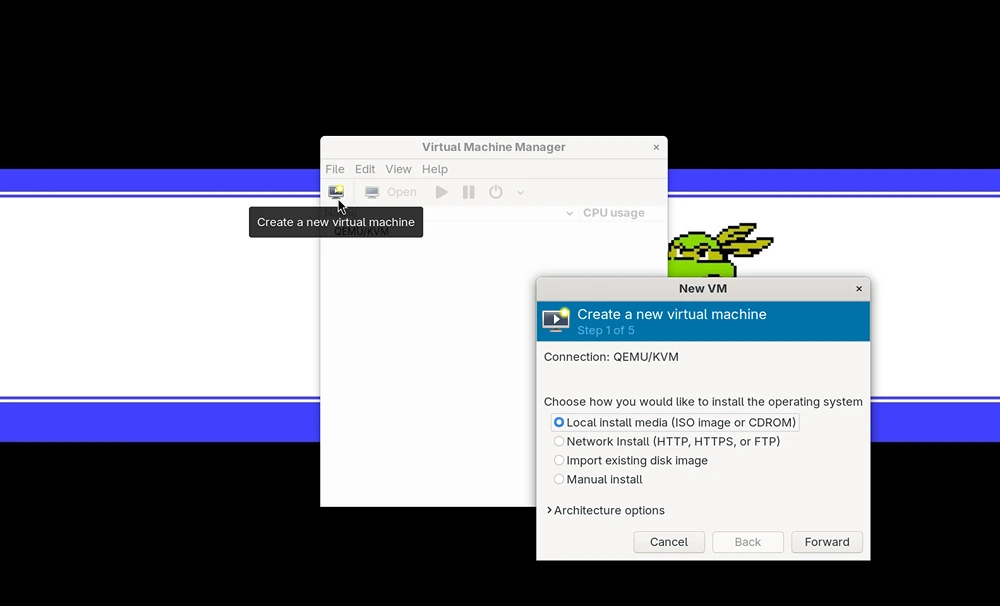
Click on "Create new virtual machine".
You can choose a local .ISO, or a network install, or even import an existing disk image.
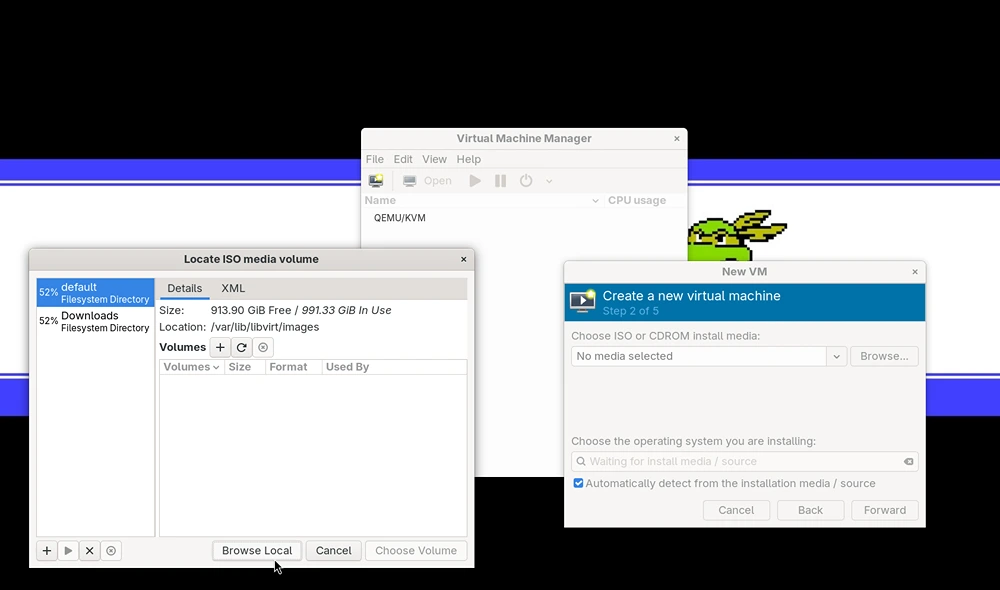
Here, we opted for a local .ISO, click on browse local to browse your folders in search of your installation media.
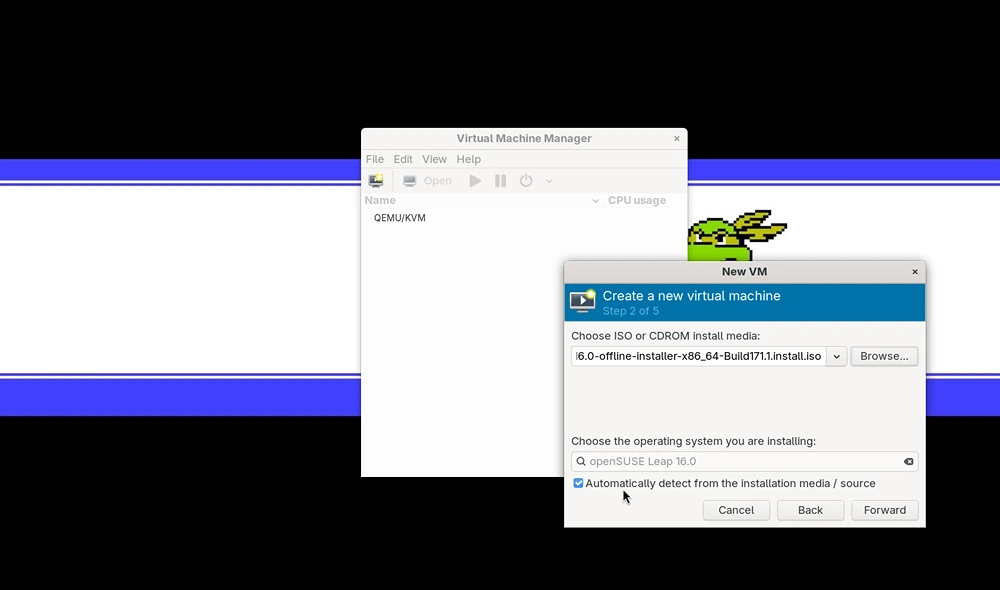
As you can see, the operating system is automatically detected (in most cases, if not, select Generic OS, or Generic Linux), you can un-tick the "Automatically detect operating system" opt̂ion to choose your OS yourself.
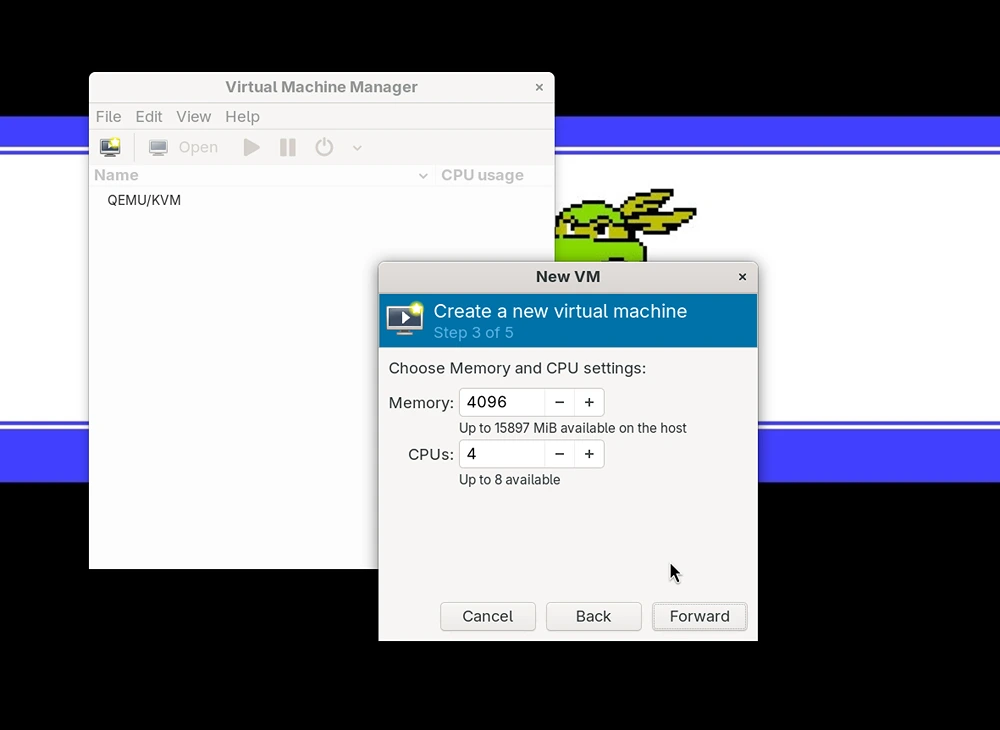
You can now assign CPUs and RAM for your VM. The manager will suggest an adapted CPU count.
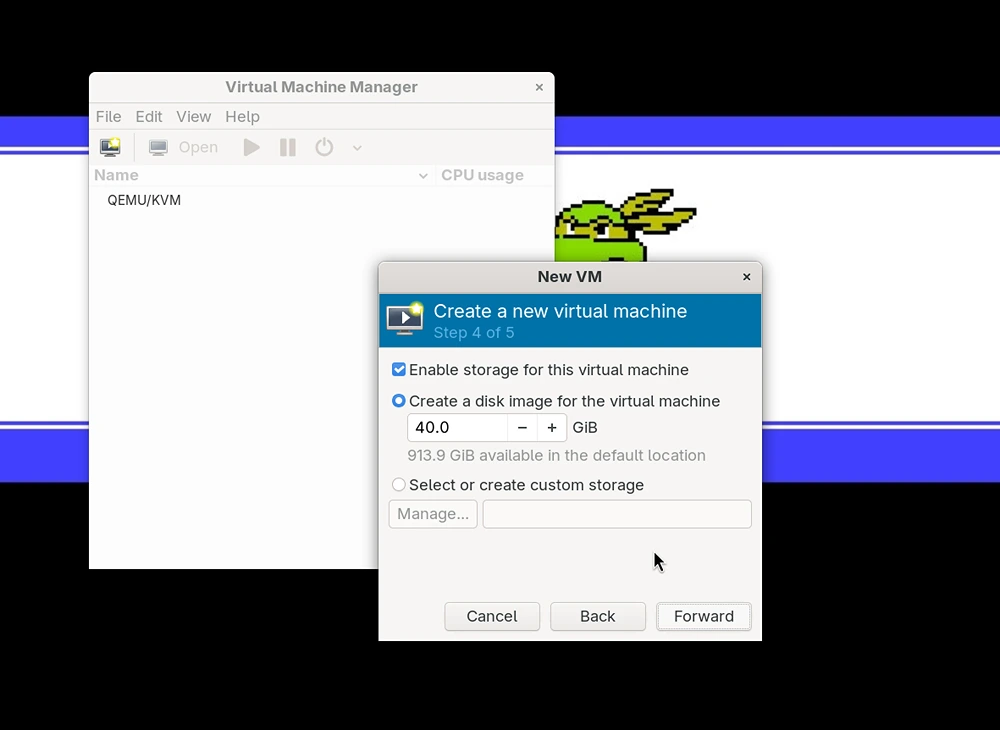
Then, we go on to memory, where you chose your virtual disk's size.
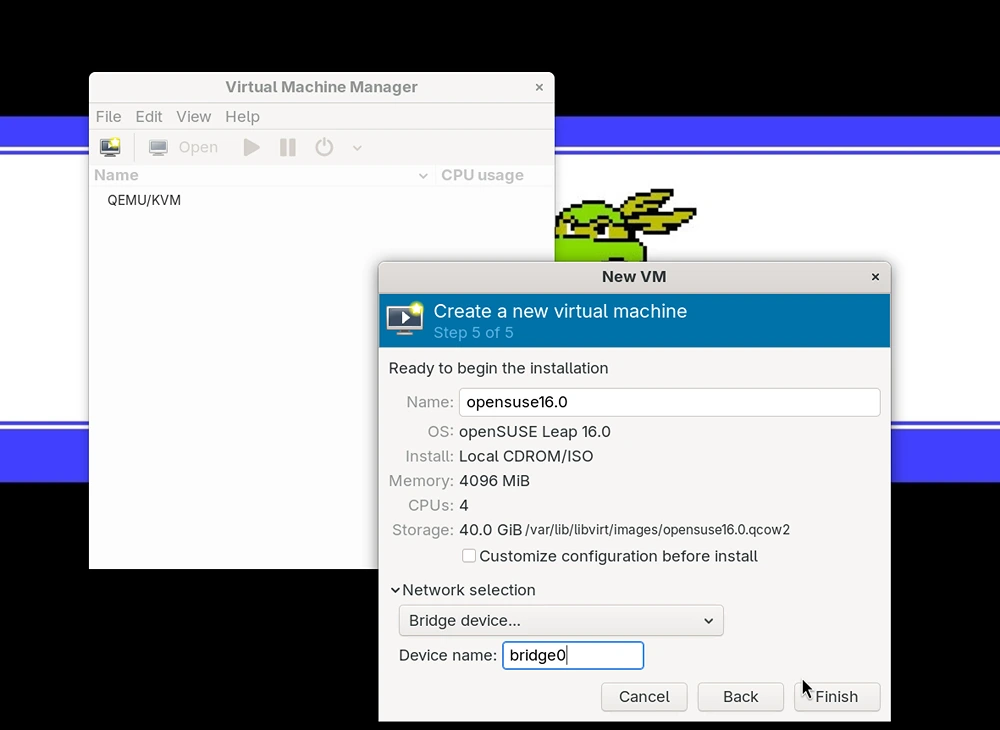
Last step, summing up before installation, but also network options.
If you want your machine to appear on the local network, don't forget to select a network bridge, which needs to be existing. If you don't know how to create the bridge, we'll see this in the next few steps !
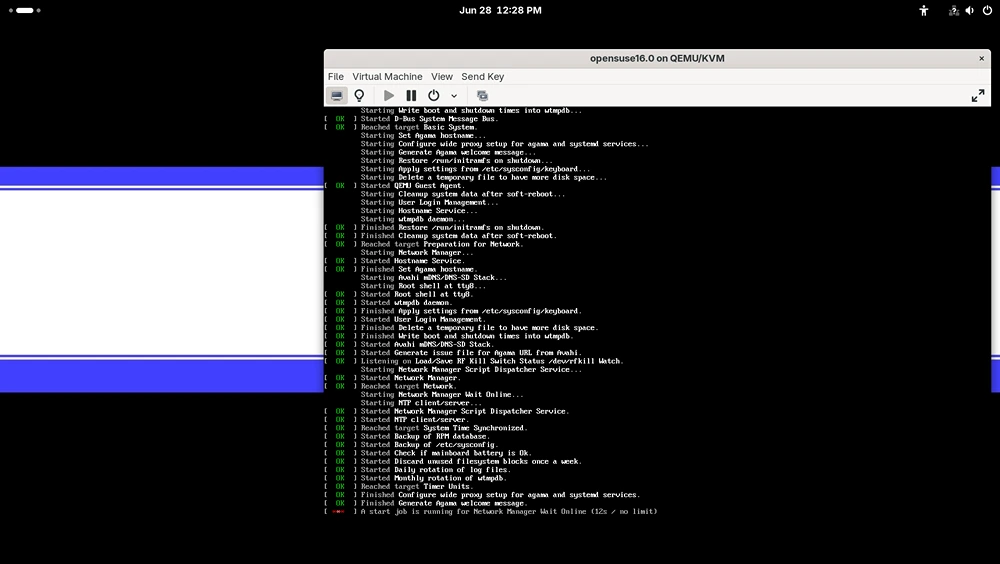
Once your virtual machine is configured, it will start and begin installation.
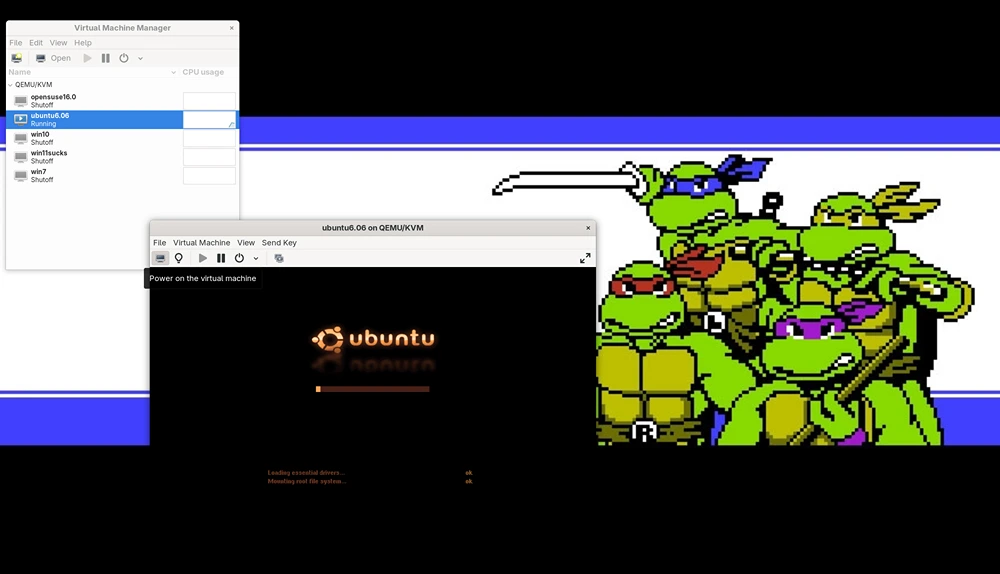
To start your VM, click on its name in the list, then the "Play" button.
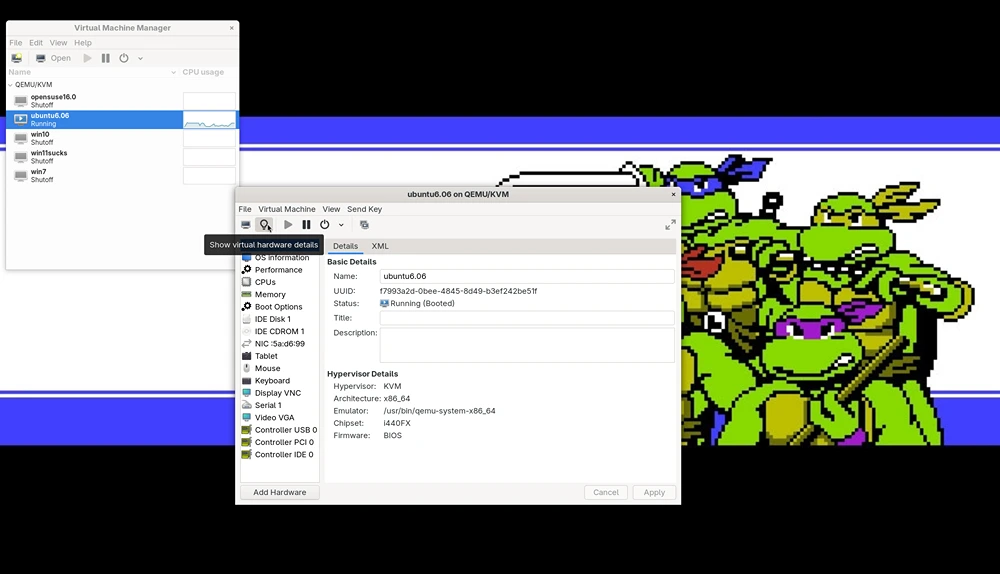
The lightbulb shaped button takes us to the VM's settings. To change most settings, the virtual machine should be stopped.
Worried about making a mistake or losing your data?
Igor Web handles this procedure safely for individuals and businesses: remotely, at our workshop in Pouligny-Notre-Dame (36), by mail-in, or on-site across departments 36, 23, 18, and 03.
Optionnal : install Cockpit to manage your system.
Why install Cockpit ? openSUSE, since Leap 16.0, made the choice of Cockpit for system administration, replacing the beloved but ageing YaST. Cockpit is a solution chosen in no small part by Red HAt, which allows to manage a whole machine via a Web browser, with a modern GUI.
In our case, we'll use it to create a bridge and then to manage our virtual machines from the LAN.
In Myrlyn, go to the Patterns tab and select Cockpit-client down the page. Install it.
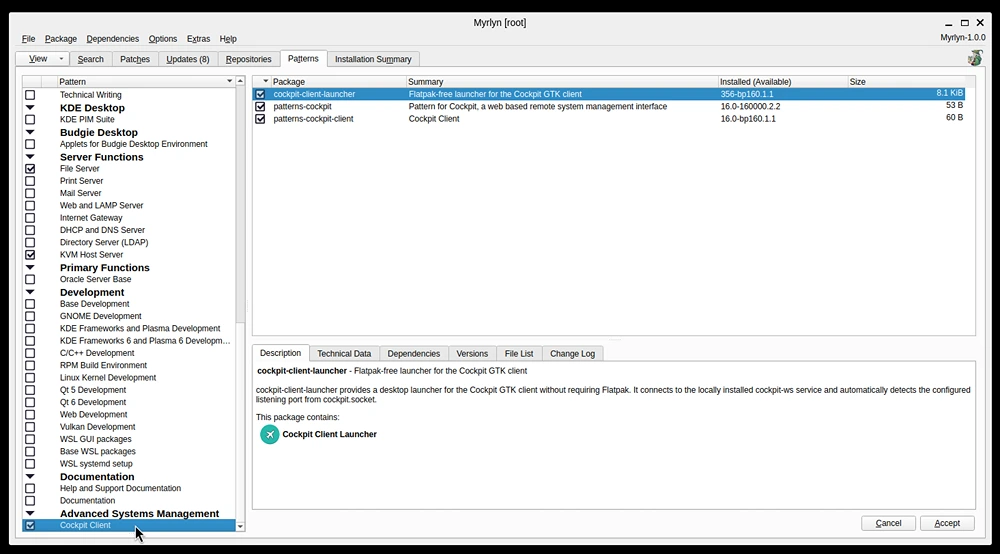
Cockpitis now in your apps, click to start it.
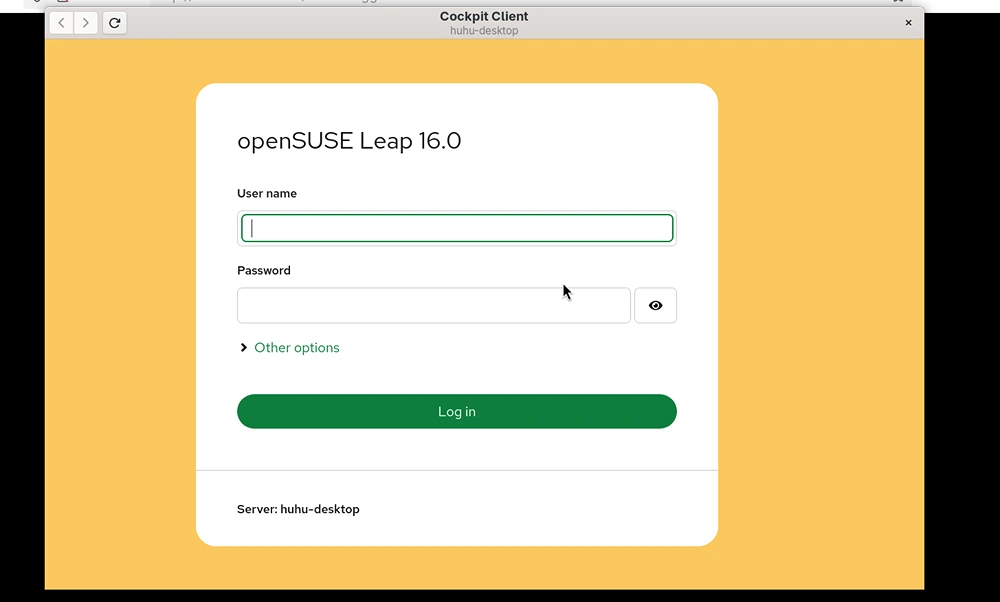
Input your username and your password (the one you use to login on your machine). Welcome to Cockpit !
You can also access it from a Web browser by typing "localhost:9090" or your local IP and the port 9090 (this port must be open on the firewall to access it from another computer on the local network).
Make your VMs visible on local network by using a bridge.
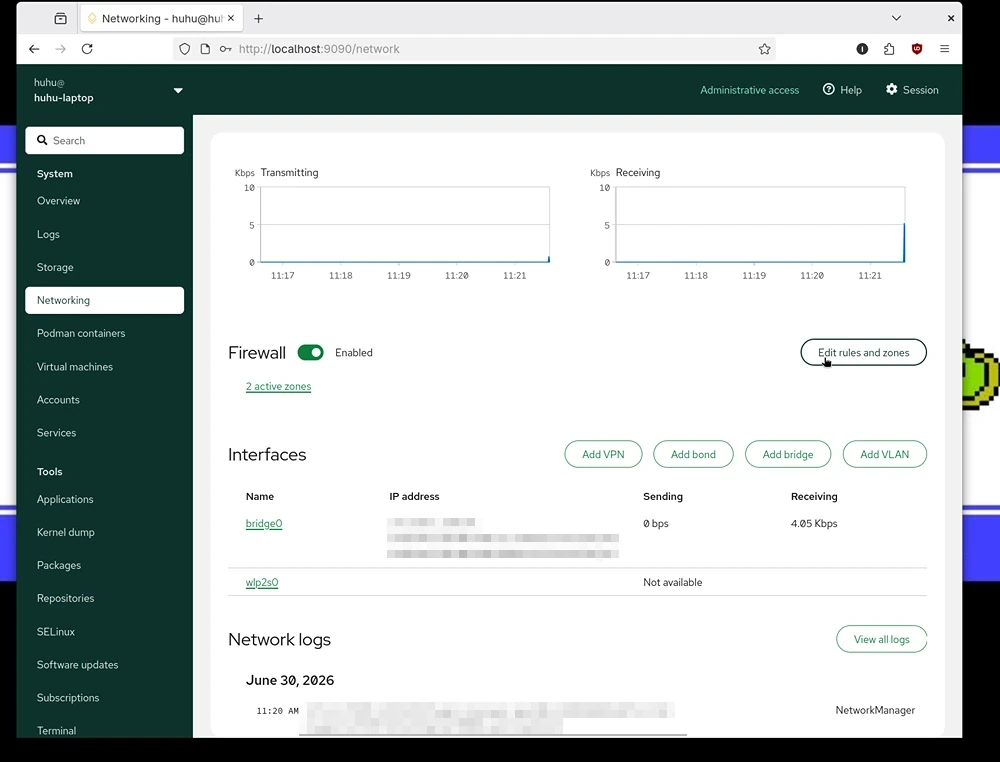
Go to Networking, then click on "Add bridge" to create one.
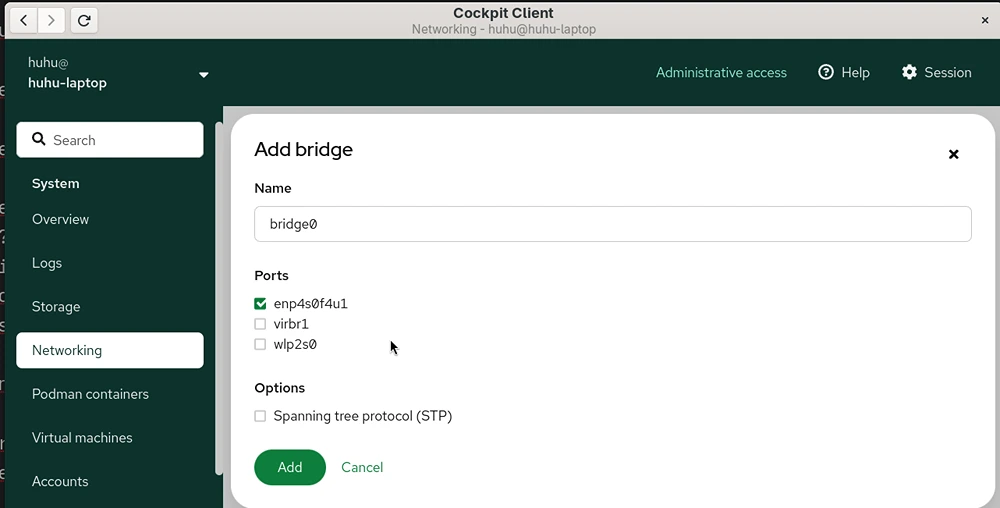
You can change the bridge's name, but what matters is choosing the right port, here it's enp4s0f4u1 that means our ethernet port, if you use Wifi it would be starting by "wl...", and virbr1 is another bridge I created before.
Choose the port by which your physical computer is connected to the network.
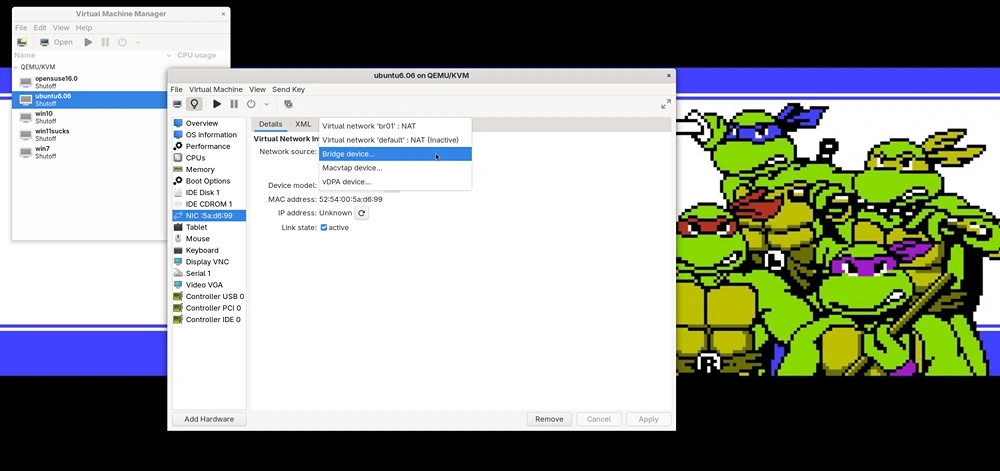 In the VM Manager, go to the "NIC : ..." tab and change the network source for the bridge you just created.
After restarting the VM, it will now be visible on the local network, by the IP you use for your physical computer (your host).
NB : to know your local ip on Linux, open a Terminal and type : ip addr show
Optionnal : install Cockpit-machines to manage your VMs.
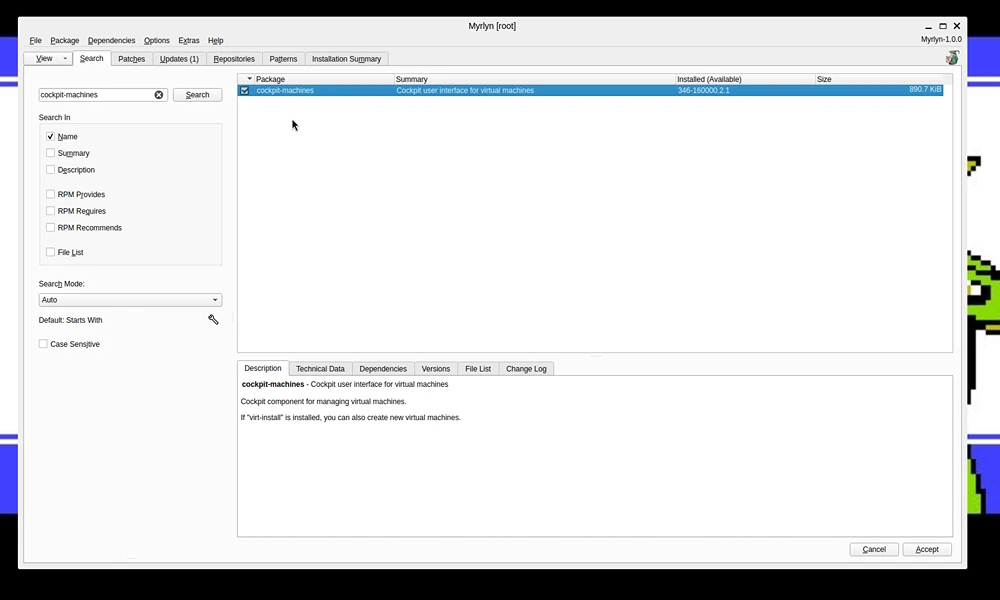
In Myrlyn, search for the package named "cockpit-machines" and install it.
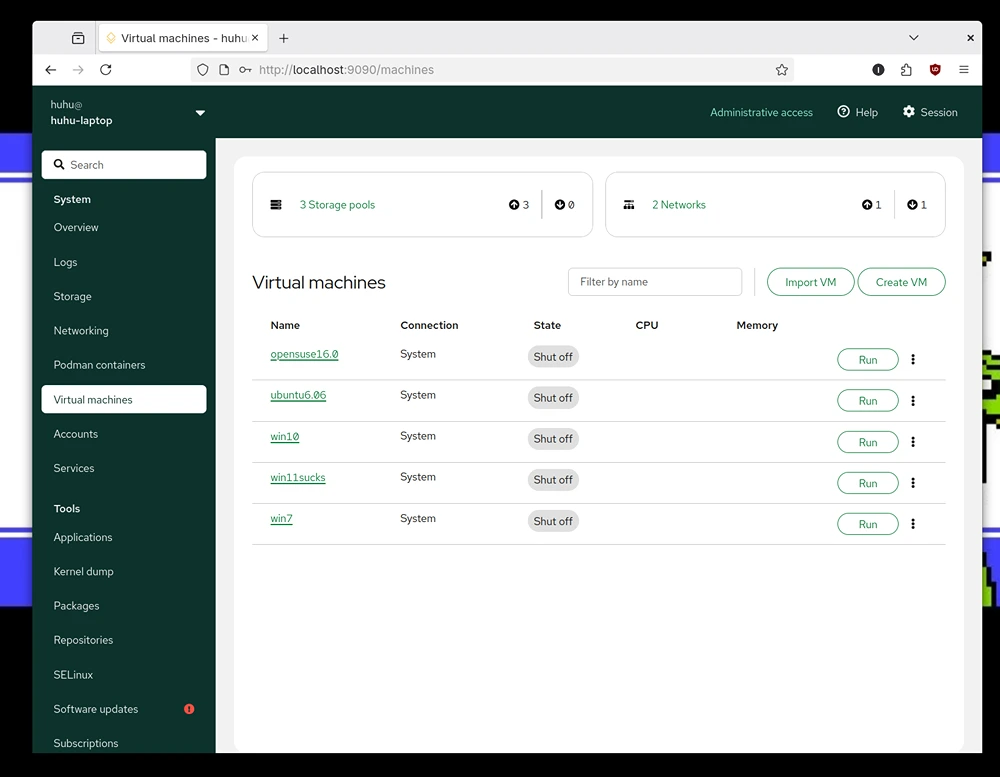
You now have a new tab in Cockpit, from which you can manage and create your virtual machines !
N.B. : we noticed that Cockpit-machines was not so reliable when creating virtual machines, until it gets fixed, it's easier to create them with the VM manager, and then manage them with Cockpit.
Connect to your VM on LAN using remote desktop software (RDP or SPICE).
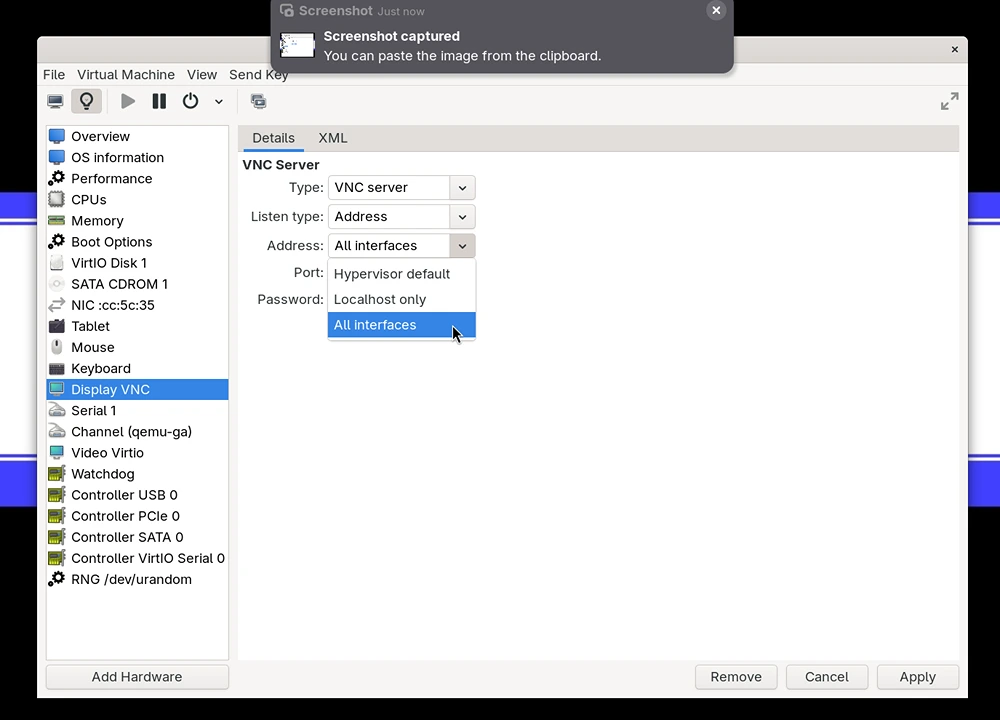
In the virtual machines manager, go to your VM's settings, then in the "Display VNC" tab.
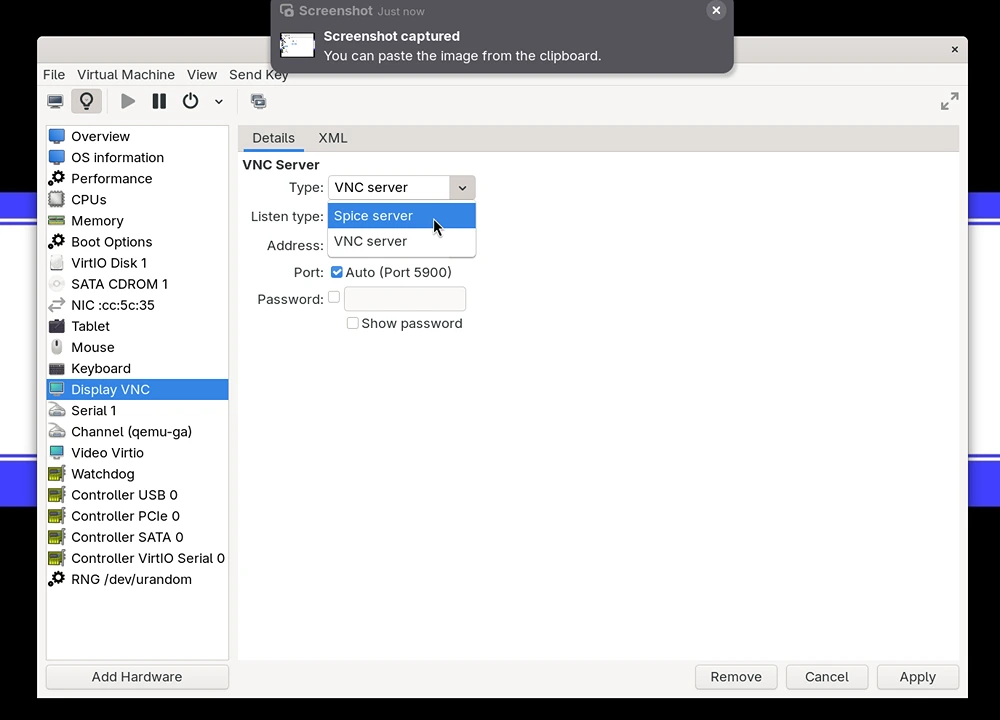
To use remote desktop on this VM from the LAN, choose "All interfaces" in the "Address" options. This means all machines from the LAN can use remote desktop via VNC on this VM.
By the way, you can change the type to "Spice" for better performance.
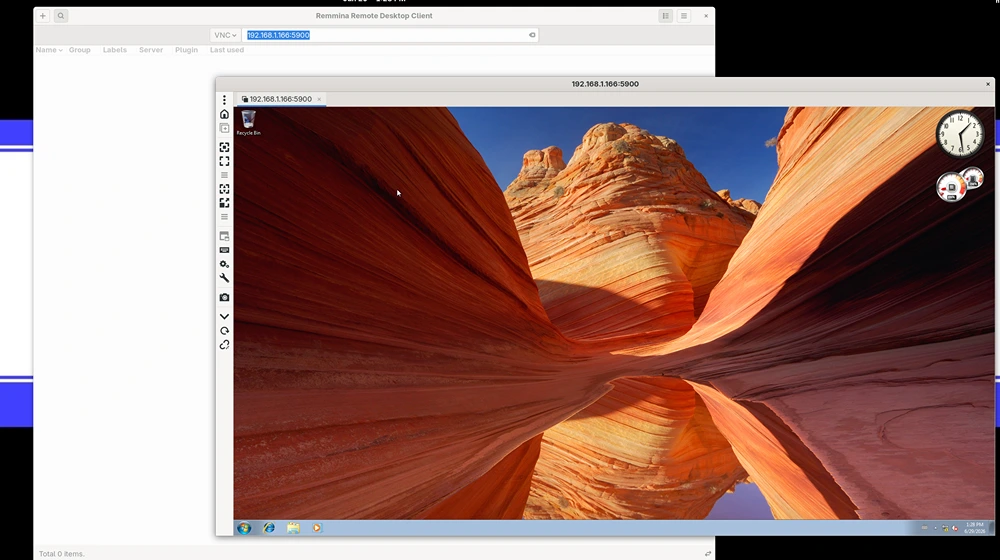
From any VNC client, such a Remmina which is included out-of-the-box on openSUSE, type your VM host's IP (the physical machine your VM is on), followed by the :5900 port and connect to the VM (it must be running). You now have access to remote desktop from any machine connected to the local network (even tablets and phones).
If the connection is refused (which is most likely), you need to open the port 5900 in your host's firewall. For this, go to Cockpit, in the Networking tab.
Click on "Edit rules and zones", then "Add service".
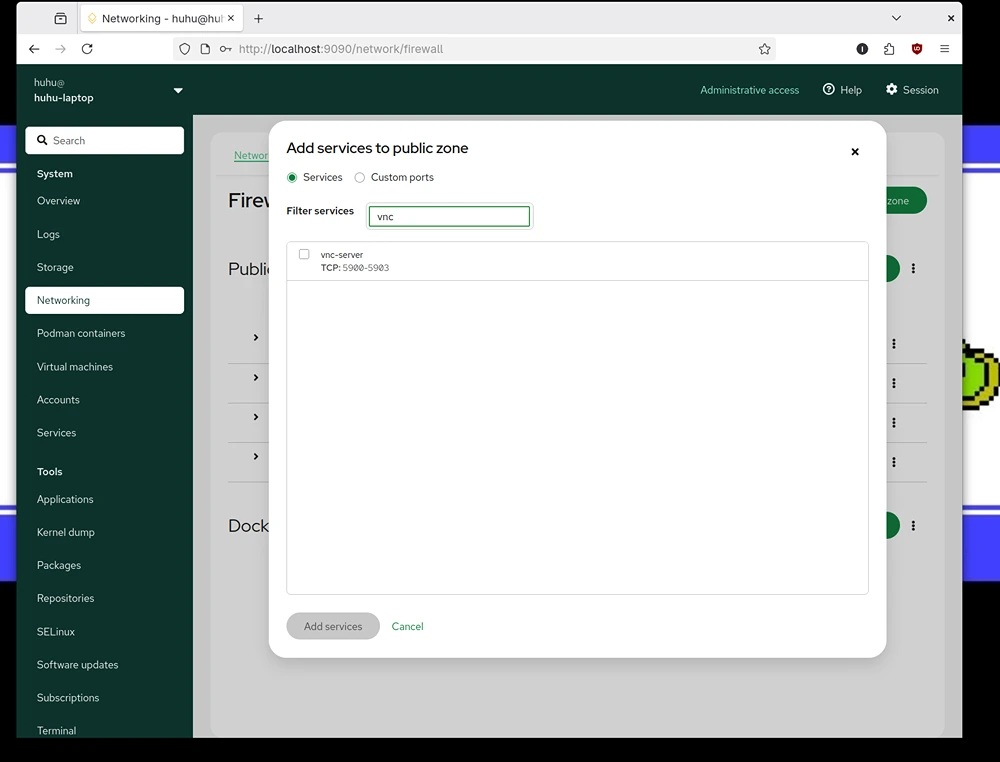
Either you can add a "Custom port", or just type in "vnc" in the search bar and add the "vnc-server" ports.
Now you can use remote desktop from the LAN !
Conclusion.
We learned how to install and set up KVM, how to use it to create and manage virtual machines, and how to access them from the local network in openSUSE.
Thanks to this tutorial, you now have the foundations of virtualization on openSUSE, but there's so much more to learn, such as migrating VMs and managing backups, which are all freely available on KVM. Maybe we'll cover this in another tutorial, but for now try this already.
Stay tuned for more openSUSE tutorials!
Ressources
- SUSE documentation on virutalisation.
- Remmina remote destktop
- KVM, official site
- Cockpit, official site
- Myrlyn, on GitHub
Q&A
Some frequently asked questions :

Got questions ?
-
What's the point of using virtual machines ?
A virtual machine gives you a fully equipped virtual computer, and can be used for many cases : try an application without modifying your main computer, run a server on an isolated virtual computer, use legacy or obsolete operating systems to run old software, etc.
-
Why KVM and not VirtualBox ?
We chose KVM because first of all it's available out-of-the-box on openSUSE, and second it is a type 12 hypervisor, integrated to the kernel layer. This means better performance, and since KVM has been part of the Linux kernel since 2007, it means it's a proven and tested solution that has benefited from continuous updates over the years.
-
What about containers ?
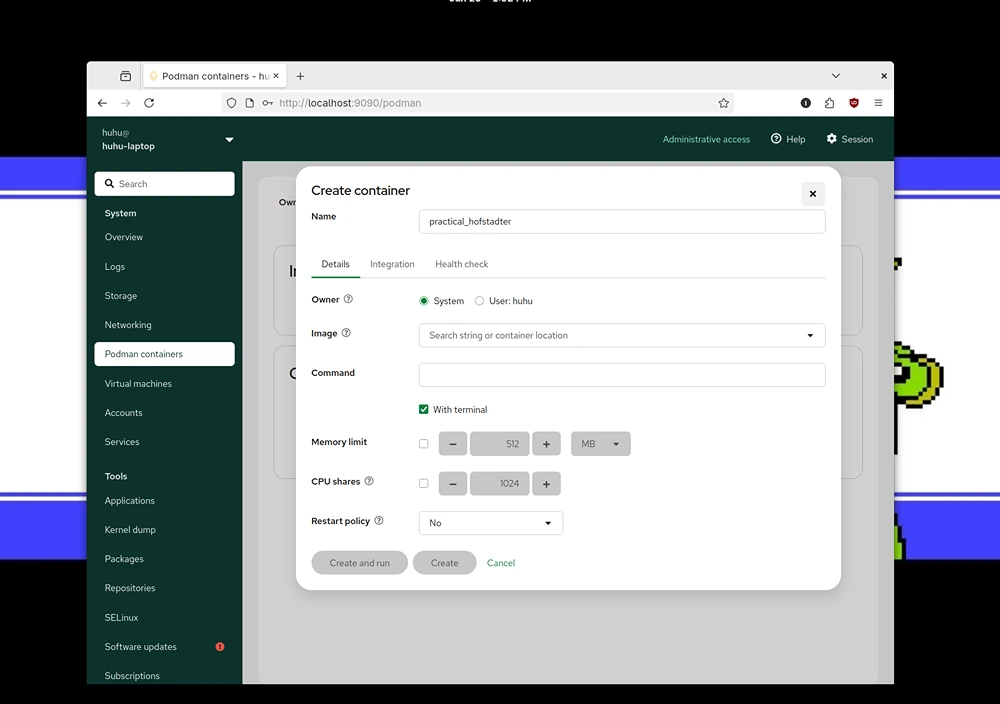
Podman est aussi intégré à Cockpit
openSUSE lets you create and manage containers with Podman (almost the same principle as Docker really), and the "cockpit-podman" package allows you to do it directly from Cockpit. With some tweaks you can also install Canonical LXD to use system containers and install full Linux distros inside containers.
-
Can I use a virtual machine for gaming ?
Personally, I know someone who did it successfully (or so he said), and uses a virtual machine as a gaming PC....
It's a lot of work, because you need to setup GPU passthrough, and you will need a really beefy CPU, but it's indeed possible, and some tutorials cover it on the Internet.
However, to play old or lightweight games, it's definitely possible and easier, for instance if you want to play Wizardry VII on a Windows XP virtual machine, it's definitely possible !
Need an expert to carry out this procedure or support your organization?
Take no risks with your hardware or data. Igor Web Assistance provides fast, reliable support for both home users and professionals: